Getting Started
Installation
Full Version
For Windows, unzip the full version to any folder and run ImageTrans.exe. For Mac, drag the app in the dmg file to Application.
Cross Platform Version
Download ImageTrans’s zip file, unzip it to any folder, double-click ImageTrans.jar or enter the command line java -jar ImageTrans.jar to run it.
The software depends on JRE 11+. Please download and install it first. Download link: Liberica JRE 11.0.19 full version
ImageTrans also relies on OpenCV, please download the runtime file according to your system, unzip and put it under ImageTrans’s folder. Download link: GitHub
Configuration of OCR and Machine Translation
ImageTrans has integrated common online OCR and machine translation APIs. Usually, you need to apply for their API keys to call them. ImageTrans has included the API keys of some services, which can be used directly:
OCR: Baidu, OCRSPACE, Azure
Machine translation: Baidu, Tencent, Cloudtranslation, mymemory, DeepL KeyFree
In addition, some offline OCR and machine translation are also supported.
Offline OCR:
Tesseract
If you need to use Tesseract for OCR, please install it by yourself (Link) and specify the path of Tesseract in ImageTrans.
Here is an installer version for Windows: UB-Mannheim Tesseract5.
The built-in OCR in Windows 10
Windows 10 comes with built-in OCR, but you need to install the language environment first. Actually, it has the same engine as Azure and OCRSPACE. This OCR engine in ImageTrans is called WinRT because it is based on the Windows Runtime API.
mangaOCR
This OCR can accurately recognize the text of manga. Installation instructions: https://github.com/xulihang/ImageTrans_plugins/tree/master/mangaOCR.
macOCR
The system’s built-in OCR on macOS 10.15+. Details: https://github.com/xulihang/ImageTrans-docs/issues/341.
ABBYY
It supports calling ABBYY Finereader for OCR. You need to specify the path of FineCMD.exe in the Preferences.
PaddleOCR, EasyOCR
You need to install Python and the above software and run them with the server scripts provided, like the server of PaddleOCR.
Offline machine translation:
OPUS-CAT. Opus-CAT is the offline machine translation engine by the Helsinki Natural Language Processing Group. Download and install it from here and install the OPUS-CAT machine translation plug-in to use it.
eztrans xp. This is a Japanese-Korean translation software. Check out issue29 for its usage.
Verification
When you start ImageTrans, a validator will show up. You need to verify with your email and order number. The order number can be found on the purchase page.
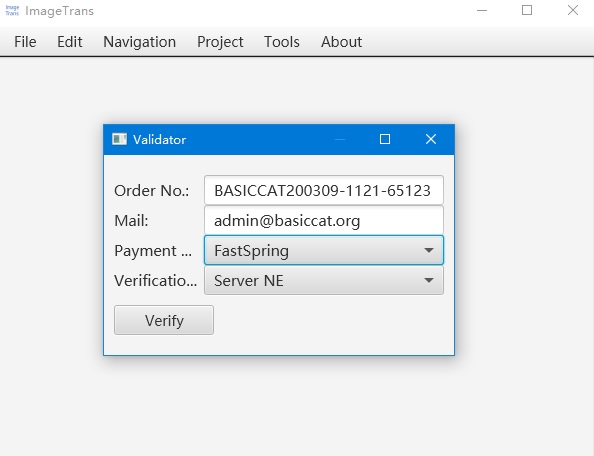
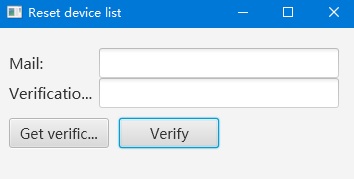
Each email can be used for verification on at most three devices. If you want to use it on the fourth device, you have to reset it with your email.
New project
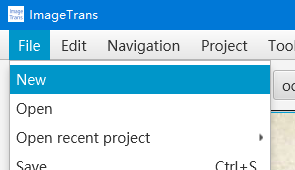
Click File->New, select a place and enter the project name to save the project file.
Import Pictures
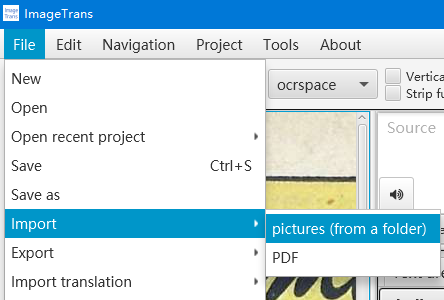
Click File->Import pictures (from a folder) and select in which folder the picture exists to import. It will read all the subfolders and import existing jpg and png files.
You can also use the context menu to paste an image.
It can also import PDF files and extract selectable text.
Transcription
You can mark text areas in boxes and get their text. The tool supports manual selection and four automatic selection methods. Further adjustment is also supported.
Create Text Area Boxes Manually
Double-click on the picture to create a selection box. Press on the middle area to move the box and press on the lower right corner to resize.

There is also a quick creation mode. Click the button on the left and you can press and drag your mouse cursor to create boxes quickly.
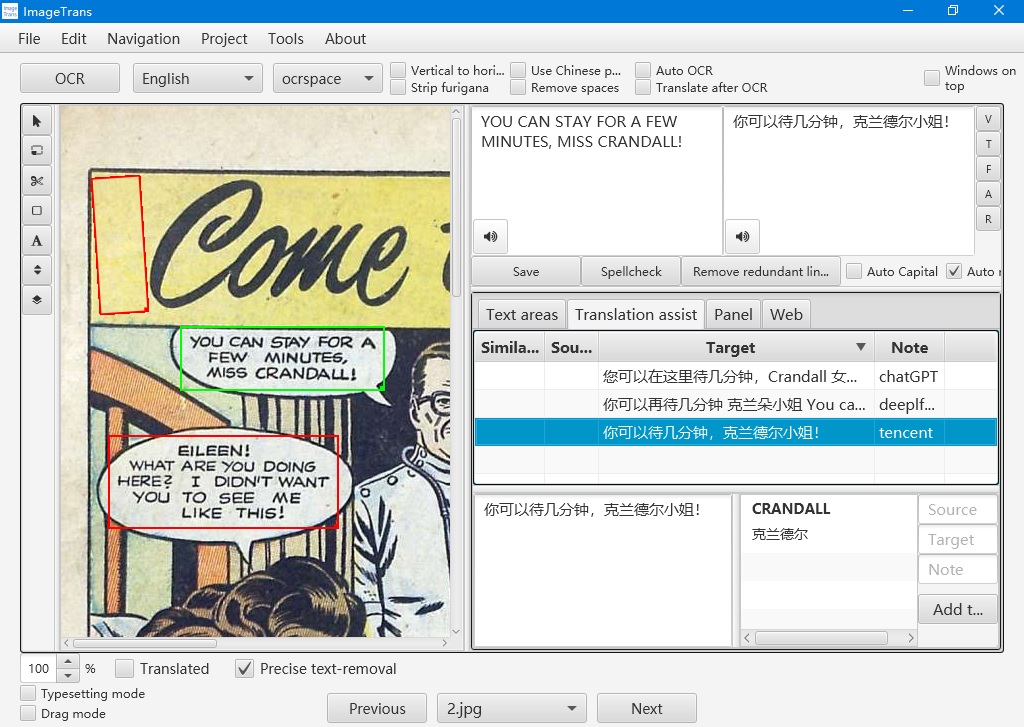
OCR
Select the text area, select the right language, choose an OCR engine and press OCR.
Detect Text Areas and Recognize Text
Select the language and an OCR engine, click Edit->Detect text areas and recognize text. Youdou and Google detect in paragraph level and other engines detect text lines.
Detect Balloons
Click Edit->Detect Balloons to detect all the balloons (or bubbles). By default, Baidu’s online balloon detection service is used. You can also use offline balloon detection. See Balloon Detection for details.
Heuristic and natural scene text detection methods are also provided, which are more complex. See Text Area Detection.
OCR All Text Areas
We can mark out text areas first and then OCR them in bulk. Click Edit->OCR All Text Areas to do this.
Sort
Sort text areas based on coordinates.
There is also a sort-by-panel feature designed for comics. Check out issue147 for details.
Export
There are several options for exporting.
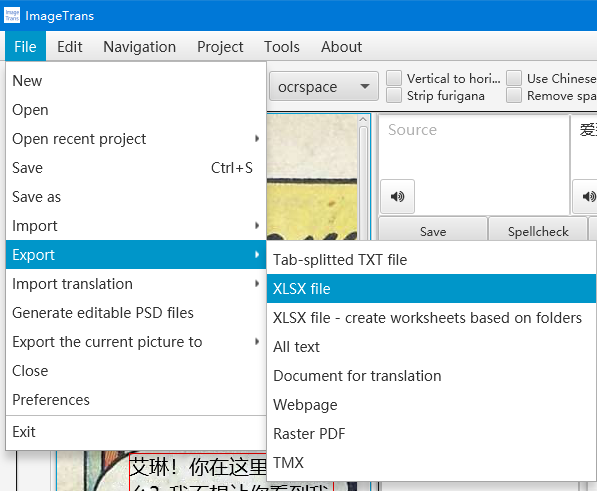
Tab-splitted TXT documents include coordinate, font style and text.
The XLSX file has the same content as TXT’s.
XLSX file - create worksheets based on folders. It will store picture names, source texts, and target text in separate sheets.
All text. Store text in separate txt files for each picture.
Document for translation. Export source text and target text to a docx, txt or XLIFF file.
Webpage. Export the project as a web page for reading on mobile phones in a local network. It supports text-to-speech and reading by panels.
Raster PDF. Export the project as PDF. Searchable text layers can be added.
TMX. Export the source text and the target text as a translation memory file.
Panel. Export panels as single image files, webtoon files, or PDF files
Translation
Enter the target text in the translation area and click Save to complete the translation of a text area.
Translations can be exported as docx , txt or XLIFF documents for external translation, and then imported back through File->Import translation.

BasicCAT, a computer-aided translation software, supports direct operation of ImageTrans’s project files for translation.
Translation memory, machine translation and terminology management
Switch the tab page on the right to the translation assistant page to use translation memory, machine translation, and terminology management. You need to set up APIs and enable them to use machine translation. You also need to set the language pair of the project, which can be done through Project->Settings->Select language pair.
Pre-translation
Click Project->Batch->Pre-translation to use translation memory or machine translation to pre-translate.

Check Translated
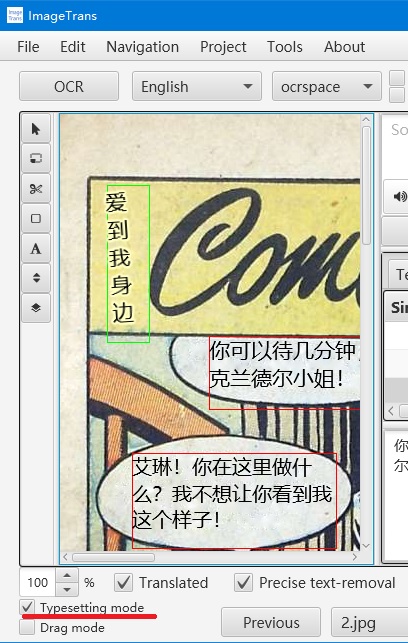
Check Translated in the lower-left corner to see the translated image. The precision mode will detect text and reconstruct the background. The imprecision mode will just cover the area with the background color.
When Typesetting mode is checked with Translated checked, target text areas will be boxed out. You can readjust their size and location.
Generate the Translated Picture
Click File->Export the current picture to->JPG, and the result will be exported to the out folder in the picture folder. Another option, ORA, supports exporting files to multi-layer image format ORA, which holds layer information for image editing software such as PS, GIMP, and Krita.
In addition, ImageTrans supports exporting as PSDs.
If you want to generate translated images for all, you need to use this menu item: Project->Batch->Generate translated images for all.
Style Text
Setting text styles has effects in two processes: see the translated result in ImageTrans and export as PSDs.
Click Project->Settings->Font Style to set the font name, font size, direction, leading, alignment, rotation, stroke and so on.
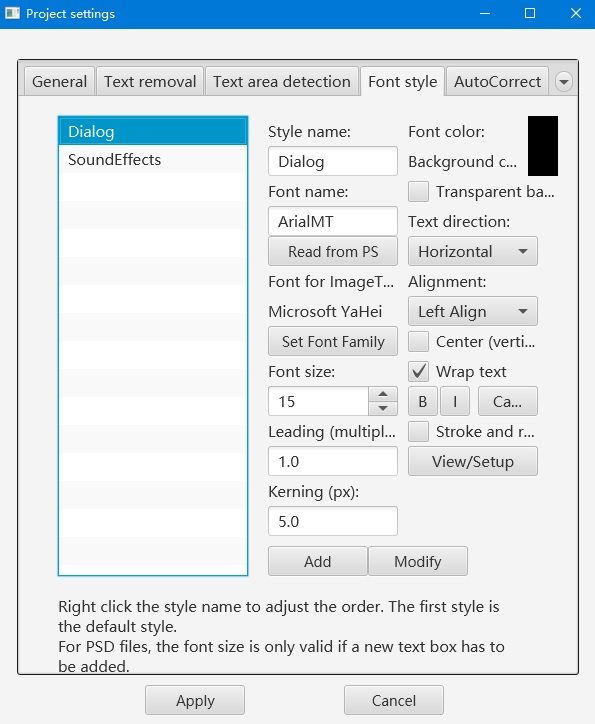
The first style will be the default style. You can right-click above the style to sort and delete it, and right-click in the blank space of the list to import styles from another project.
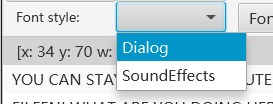
After setting the global style, you can specify which style to use for the text area.
You can also set up local styles. The local style has a higher priority than the global style.
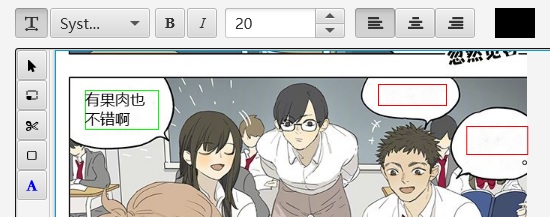
Click the Font button on the left to enable the font settings toolbar, which makes it easy to set local styles.
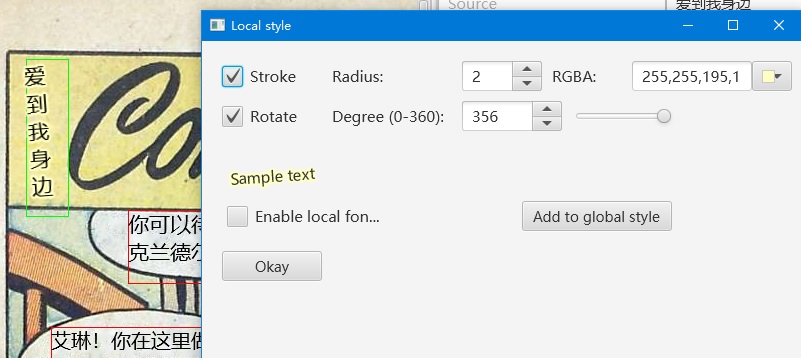
It can also be set through the font setting button above the text area list. It has a dedicated interface where you can set stroke, rotation, and whether to enable the local style. It can bring up the global font style setup interface for a more detailed setup (reads the style added at the end as local font style).
Click the Selection button on the left to enable the multi-selection toolbar. You can adjust the position of multiple text boxes and unify their font styles.

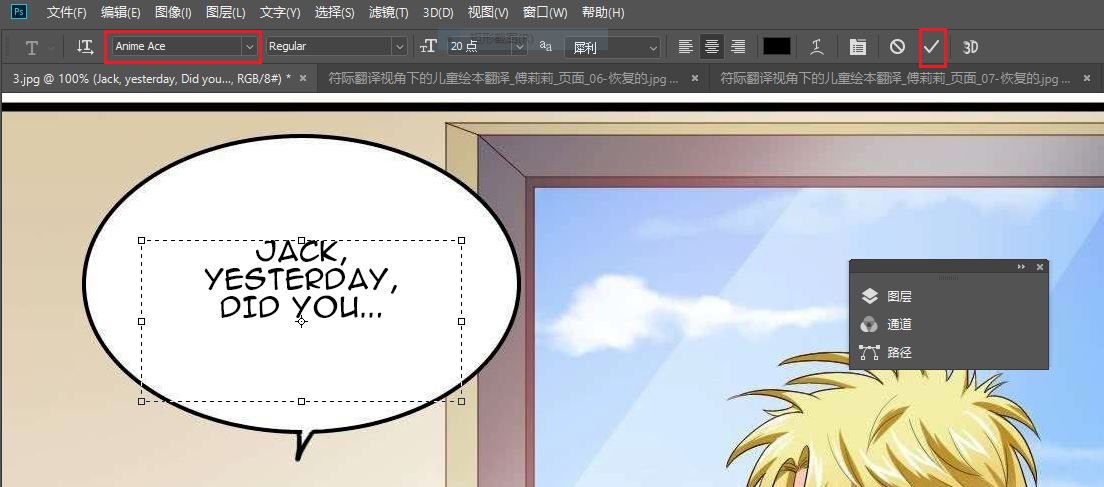
Get the font name for Photoshop
Because Photoshop requires a special font name, it needs to be obtained from PS. The way is to create a new picture in PS, create a text box, set the font you want, and complete the text editing operation, letting the text box in non-editing status. Then click Read in ImageTrans. Non-Windows systems have to use readFont.jsx scripts.
Auto font resize
By default, the software can automatically adjust the font size according to the size of the text area. You can set whether to enable this feature and the maximum and minimum font sizes in the project settings.
The font size priority is as follows:
Font size in local style > Auto font size > Font size in global style.
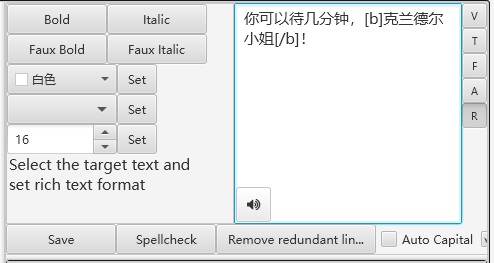
RichText
ImageTrans can use BBCode to mark rich text formats, such as the bold and italic effects used in the following image.

It is represented using the following text with BBCode: 留[b][fi]性感[/fi][/b]的绿发,穿绿皮衣的那个人。.
Below is a table of supported tags:
Tag name |
Effects |
Example |
|---|---|---|
b |
Bold (requires the font itself to support bold) |
[b]text[/b] |
i |
Italic (requires the font itself to support italics) |
[i]text[/i] |
fb |
Faux bold (only for horizontal text) |
[fb]text[/fb] |
fi |
Faux italic (only for horizontal text) |
[fi]text[/fi] or [fi=2,2,2]text[/fi] The three values respectively represent the degree of inclination, vertical offset, and height offset |
u |
Underline (only for horizontal text) |
[u]text[/u] |
s |
Strikethrough (only for horizontal text) |
[s]text[/s] |
h |
Horizontal within vertical (only for vertical text) |
[h]text[/h] |
offsetx |
Horizontal offset (only for vertical text) |
[offsetx=5]text[/offsetx] |
offsety |
Vertical offset (only for vertical text) |
[offsety=5]text[/offsety] |
fontfamily |
Font family |
[fontname=Arial]text[/fontname] |
fontsize |
Font size |
[fontsize=32]text[/fontsize] |
fontcolor |
Font color |
[fontcolor=#FF0000]text[/fontcolor] |
You can tap the button R to the right of the editing area to enable the rich text editor for quick insertion of the corresponding BBCode.
Batch
All of the above operations on a single picture can be performed in batch through Project->Batch. You can perform selected operations on all images at once through the custom workflow function.
Toolbar
Click the toolbar buttons on the left side of the program to switch between different toolbars.
Currently, the following toolbars are supported:
OCR.
Multiple selection. It can select multiple text areas and perform operations such as aligning, deleting, merging, and unifying fonts.
Text area cutting.
Quick creation of text boxes by dragging.
Font.
Sort. It can detect panels and display the ranking numbers on text areas.
Source image related. It can adjust the transparency of the translation layer and align text areas with the original text areas.
Edit. It can rotate or flip images.